Follow the building progress of my Mountfield dolls house from the Dolls House Emporium.


This is my second dolls house; the first one was built from a cheap kit bought from Ebay and completed about eight years ago. Although my friends enjoyed poking their noses in through the windows to see what was inside, I just had a feeling I could do an awful lot better.


This is house number two; my attempt at improving upon house number one. I hope you enjoy it.


Please feel free to leave a comment on my blog if you wish.

Sunday 31 July 2011

My New Purchases

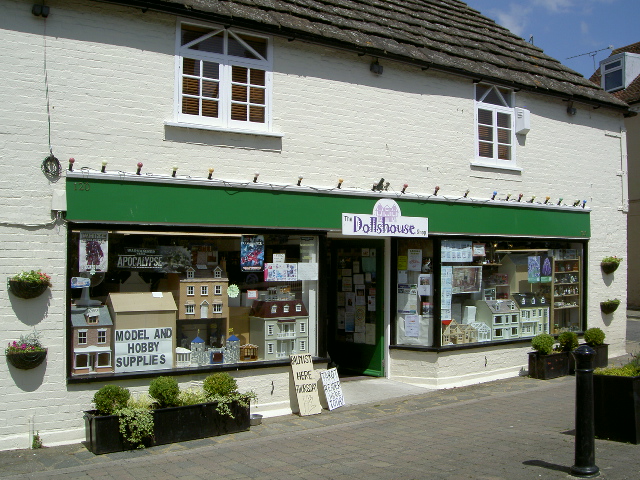
Our trip to the Steyning Dolls House Shop was a successful one.  I say "our" as Mario is taking more and more of an interest in miniatures and wanted to come along with me so it was nice to have some company on the journey.
Needless to say, I could have bought SO much, but I exercised control and stuck to just a few bits and pieces.  Here are some of them.
I like the fact that these mugs are all different colours.  I think I'll make some hooks and hang them underneath the kitchen wall units by the kettle.

This glass cake stand was so delicate, I just had to have it.

I think this is the closest mini dog that I will get to my "Goose" and so I bought him with the intention of painting him black.

The cat curled up the chair is one I already had, but the one on the new carpet looking up at him, is just like my cat, Luca.

I have carpet in the dining room now too.  I also bought the carpet that I'm going to use in the living room, which will be my next room.

The lovely mantle clock is one I found on eBay.  (It also hides the split in the wood perfectly!)

I also bought a welcome mat for the hall and beautiful light that I'm going to use in the living room as well as a more modern skirting board and coving.  OK - I know coving doesn't go with this house, but the living room is going to be more new modern than traditional modern and I needed a slightly different look.

It took an hour to fit the carpet.  Perhaps I should have fitted it before I put in the chimney breast and the fireplace?


I also bought a tiny little horseshoe for above the back door.  This got me excited about the exterior of the house again and so I've started to make a "wrought iron" gate and a tiny little picket fence.  (Pictures coming soon.)  It looks as though I'm going to have a very small front garden!

Friday 29 July 2011

A Local(ish) Dolls House Shop!

The internet is a wonderful place for sourcing miniatures and you can get some great bargains and ideas, but I've always been a bit old fashioned and I would love to go to a dolls house shop in real life.  To that end, since April I've been looking for a dolls house shop that I can physically go to and indulge my imagination and inspiration.  Sadly most appear to have gone out of business.  Believe it or not, within a 40 mile radius of my home, shops in Byfleet Surrey, Dorking Surrey, Twyford Berkshire, Lingfield Surrey, Shepperton Middlesex and Farnham Hampshire are no longer there.  

Whilst planning my holiday to Devon I even Googled dolls house shops in Barnstaple, only to discover that the two that I found online were no longer.

But GOOD NEWS!  I've found a dolls house shop in Steyning, West Sussex that is still open!  It's an hour and twenty minute drive there, but it's going to be worth it.
 HURRAY!
So tomorrow I'm off to a shop that is dedicated to our love of everything mini!

I can't wait and just had to share my excitement with my followers!  
And there's 27 of you!  I'm so proud that 27 of you want to watch my progress.

THANK YOU FOR FOLLOWING MY BLOG.
:-)
I can't wait to show you tomorrow what I've bought (it would be foolish to assume that I won't buy anything wouldn't it!)

Saturday 23 July 2011

Dining Room

I've spent all day on the dining room and my eyes are sore from concentrating so much on trying to get the skirting around the fireplace to look right!  Thank goodness for Polyfilla and cocktail sticks to apply it with!
It's not perfect, but with a little bit more filler, a good sanding and another coat of paint, once the carpet is down, I reckon it'll pass.

I found this gorgeous little mother-of-pearl seahorse in my Mum's bead box (she lent it to me when she learned I of my mini-ing.)
I then decided that he was wasted just sitting on the mantlepiece like that, so with a couple of matchsticks, I built him a picture frame to go in.  His frame also matches the one above which houses a dried flower that was in a box of "things that might come in useful one day" that my Mum also gave me!

And another bead from Mum's box made a perfect "porcelain" vase!

The room is really starting to come together and so I put the dresser and the table and chairs back in to have another sneak preview!

Right, that's it.  No more computers or miniatures for me today.  My eyes need a rest (and probably a trip to the optician soon too!)

Friday 22 July 2011

Fireplace & Chimney Breast - Dining Room

One thing that has always niggled at me when looking around peoples real life houses is when you see a fireplace that looks like it has been "stuck" on the wall.  If you're going to go to the trouble of building a false fireplace for a gas or electric fire, then why  not go to the trouble of building a false chimney breast too?  Fireplaces against chimney breasts look far more authentic and, to me, a fireplace without a chimney breast is naked!

With that in mind, I set about building a chimney breast for my dining room and so out came my trusty balsa wood again!

I had bought a plain wood fireplace from Ebay...

...and painstakingly painted it and stained it to match the internal doors in my house.

but I still didn't like it when I put it in place so I built an overmantle to go with it...

Now that's better!

I then chose a wallpaper from www.jennifersprintables.com where you can download and print off wallpaper for free!
The wallpaper is going on the chimney breast alone.  The other walls will have a sage green below the picture rail and a very pale green above.

and then I couldn't resist putting some furniture in (temporarily) to get a sneak preview of what it will look like.  I do like my sneak previews!


Wednesday 13 July 2011

Kitchen - Finito!

This week I found a little piece of furniture that I had previously bought to use as a book case, but had never got round to painting or varnishing.  I painted the top and bottom to match the kitchen units and waxed the bare wood and I now have a pan rack.
As you can see, my fridge freezer arrived too and it was packed full with little bits of food.

And I added a few little bits and pieces (kettle, toaster, microwave, smoothie maker, pedal bin etc) to give the kitchen that authentic look.


Over time, I may add a few more bits (maybe hanging mugs from under the wall units or adding the odd bottle of washing up liquid) but for now, that's my kitchen done.
I now move on to the dining room.

Saturday 9 July 2011

Kitchen Units

The day I made the kitchen units up was the day that my partner borrowed my camera to go to a charity salsa do, so I don't have pictures of them as I was going along.  I spent an entire day working on them though (eleven hours I think!) and they look fabulous now.  Glued, painted, sanded, painted, waxed, and some of the handles put on...


I couldn't resist just placing a couple of the base units in the kitchen to get a sneak preview of the room.
Then I dedicated yesterday evening to finishing off the units, gluing them all into place and tiling with more mosaic tiles bought from Hobbycraft.
 The tiling has started.
 
 The tiling all finished.

I was originally going to have a wall unit above the base unit on the left, but I decided that it might look a bit crowded and so I've left it.  I may put a plate or pan rack above instead.  The fridge freezer has been ordered and will go just beyond the unit on the left.
I also have a few accessories on their way; a kettle, toaster and microwave.  I'm sure that filling it with all the stuff a proper kitchen would have, will just finish it off perfectly.

Just have to say thank you again to www.elfminiatures.co.uk for the wonderful kitchen kit.

Holidays and Floor Boards

I'm so sorry that it's been over a month since I last blogged.  I've been so busy.  We went on holiday for a week during June; a beautiful little cottage in North Devon.  Goose just loved showing off his running skills along Saunton Sands; people actually stopped walking to watch him!  The speed of a greyhound is amazing, the cheatah is the only land animal in the world that's faster.
Just had to put a picture of Goose in - we'll get back the house now.

So initially I blocked up the wall separating the dining room from the kitchen, painted the walls and then decided on how I was going to do the flooring.  The floor in the hall looks lovely, but it was purpose-bought floor boards and was very expensive.  This time I decided to make my own.  I bought "Jumbo Lolly Sticks" from Hobbycraft, cut off the round ends and voila! I had floor boards!   I then cut out the back of a cereal packet to the right size of the room and glued the floor boards onto that, varnished in beech and slid it into the kitchen!
I'm very proud of my kitchen floor that cost 1/10th of the price of the hall floor and better than that, I did it!